webpack中的Code Splitting
Code Splitting是什么以及为什么
在以前,为了减少HTTP请求,通常地,我们会把所有的代码都打包成一个单独的JS文件,但是,如果这个文件体积很大的时候,就得不偿失了。
这时,我们不妨把所有代码分成一块一块,需要某块代码的时候,再去加载它,还可以利用浏览器的缓存,下次用到它的时候,直接从缓存中读取。
所以说,Code Splitting其实是把代码分成很多很多块(chunk)
Code Splitting怎么做?
主要有2种方式:
分离业务代码和第三方库(vender)
按需加载(使用import())方法
之所以把业务代码和第三方库代码分离出来,是因为产品经理的需求是源源不断的,因此业务代码更新频率大,相反第三方库代码更新迭代相对较慢且可以
锁版本,所以可以充分利用浏览器的缓存来加载这些第三方库。
而按需加载的适用场景,比如说【访问某个路由的时候再去加载对应的组件】,用户不一定会访问所有的组件,
所以没必要把所有路由对应的组件都在开始的加载完,更典型的例子是【某些用户的权限只能访问某些页面】,没必要把他们没权限访问的页面的代码也加载
分离业务代码和第三方库的方法:

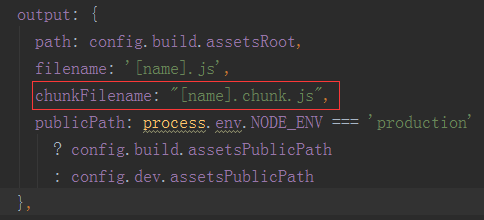
在webpack.base.conf.js里面添加上面的代码
这时打包后会出现一个问题,vendor,js和app.js会包含公共的代码,这时需要使用webpack的CommonsChunkPlugin插件(使用webpack构建vue项目的时候,webpack.prod.conf.js里面就有这个插件),
webpack.prod.conf.js里面的代码
备注:有new webpack.optimize.CommonsChunkPlugin,在webpack.base.conf.js的entry里面就不需要添加vendor了
因为有上面的代码,webpack就会自动判断模块是否来自node_modules里面,且名字是以js结尾。如果是:就把他们移动到vendor chunk里去,如果vendor chunk
不存在的话,就创建一个新的
1 // split vendor js into its own file 2 new webpack.optimize.CommonsChunkPlugin({ 3 name: 'vendor', 4 minChunks: function (module, count) { 5 // any required modules inside node_modules are extracted to vendor 6 return ( 7 module.resource && 8 /\.js$/.test(module.resource) && 9 module.resource.indexOf(10 path.join(__dirname, '../node_modules')11 ) === 012 )13 }14 }),15 // extract webpack runtime and module manifest to its own file in order to16 // prevent vendor hash from being updated whenever app bundle is updated17 new webpack.optimize.CommonsChunkPlugin({18 name: 'manifest',19 chunks: ['vendor']20 }),21 // copy custom static assets22 new CopyWebpackPlugin([23 {24 from: path.resolve(__dirname, '../static'),25 to: config.build.assetsSubDirectory,26 ignore: ['.*']27 }28 ]) 要想在打包以后,可以查看打包文件,需要用到webpack的webpack-bundle-analyzer插件,使用方法是:
链接:
先安装npm install --save-dev webpack-bundle-analyzer
然后在 webpack.config.js:
1 var BundleAnalyzerPlugin = require('webpack-bundle-analyzer').BundleAnalyzerPlugin 1 plugins: [ 2 new BundleAnalyzerPlugin({ 3 // Can be `server`, `static` or `disabled`. 4 // In `server` mode analyzer will start HTTP server to show bundle report. 5 // In `static` mode single HTML file with bundle report will be generated. 6 // In `disabled` mode you can use this plugin to just generate Webpack Stats JSON file by setting `generateStatsFile` to `true`. 7 analyzerMode: 'server', 8 // Host that will be used in `server` mode to start HTTP server. 9 analyzerHost: '127.0.0.1',10 // Port that will be used in `server` mode to start HTTP server.11 analyzerPort: 8888,12 // Path to bundle report file that will be generated in `static` mode.13 // Relative to bundles output directory.14 reportFilename: 'report.html',15 // Module sizes to show in report by default.16 // Should be one of `stat`, `parsed` or `gzip`.17 // See "Definitions" section for more information.18 defaultSizes: 'parsed',19 // Automatically open report in default browser20 openAnalyzer: true,21 // If `true`, Webpack Stats JSON file will be generated in bundles output directory22 generateStatsFile: false,23 // Name of Webpack Stats JSON file that will be generated if `generateStatsFile` is `true`.24 // Relative to bundles output directory.25 statsFilename: 'stats.json',26 // Options for `stats.toJson()` method.27 // For example you can exclude sources of your modules from stats file with `source: false` option.28 // See more options here: https://github.com/webpack/webpack/blob/webpack-1/lib/Stats.js#L2129 statsOptions: null,30 // Log level. Can be 'info', 'warn', 'error' or 'silent'.31 logLevel: 'info'32 })33 ] 使用npm run build以后,效果是:

按需加载的方法:
第一步:
1 引入组件的地方把impot改成=>2 import Emoli from '../pages/Emoli'3 4 改成5 6 const Emoli = () => import('../pages/Emoli') 第二步:
这样就可以跳转到相应的组件,才会加载相应的组件
除了把import改成 => ,还可以用require
链接: